

Hurricane Claim Guide: From the Storm to the Adjuster’s Visit
What you do in the first days after a storm, and how you prepare for the adjuster, shapes your whole claim. This guide covers the first 72 hours, documenting the damage, and the adjuster’s inspection.
Part 1: The first 72 hours
Day 1: Safety and photos
- Stay out of flooded areas and away from downed lines. Have the power checked before turning it on.
- Take photos and video of every room, the roof, the exterior and the yard before moving anything.
- Photograph water lines on walls and the ceiling stains from roof leaks.
- Find your policy and declarations page. If you can’t, ask your agent for a copy.
Day 2: Report the claim
- Report the claim to your homeowners insurer, and to your flood insurer if water came in.
- Report in writing, by email or the insurer’s app, as well as by phone. Write down your claim number.
- Give the date, address, a short description and how to reach you.
- Ask about an advance for living expenses if you can’t stay home.
Day 3: Prevent more damage
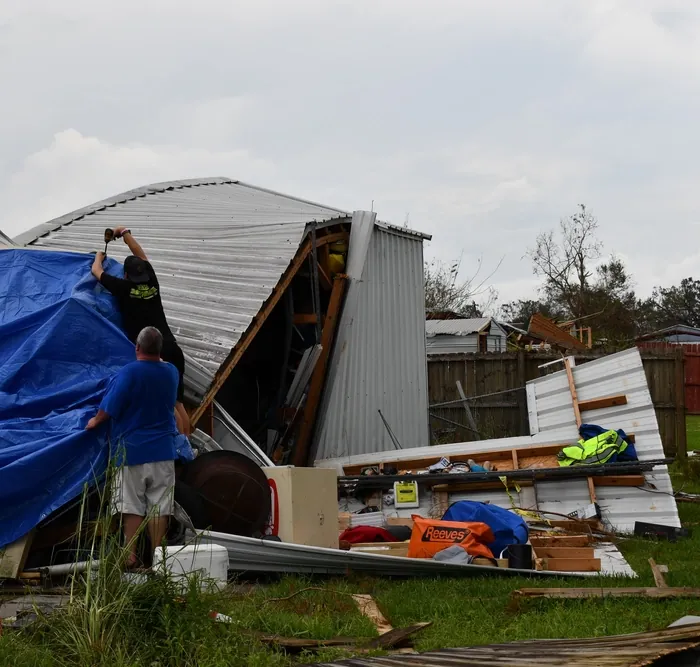
- Tarp the roof and board up openings if it’s safe. Most policies require reasonable steps to prevent further damage. Document what you do.
- Start drying out: fans, dehumidifiers, and removal of soaked carpet and drywall.
- Photograph damaged items before you throw them out, and keep samples of flooring, roofing and siding.
- Keep every receipt: tarps, lumber, labor, hotel, meals, mileage.
What not to do
- Don’t sign anything assigning your claim to a contractor without reading it.
- Don’t accept a “final” payment or sign a release until you know the full cost of repairs.
- Don’t give a recorded statement before you’ve reviewed your policy.
Part 2: Documenting the damage
The insurer pays for what it can see and price. Good records are the difference between a fair payment and a fight.
Photos and video
- Wide, then close. Shoot each room from the doorway, then each damaged item up close.
- Show scale and dates. Turn on your phone’s date stamp or keep the original files with their timestamps.
- Go outside. Roof (from the ground or a drone if it’s safe), siding, windows, gutters, fences and outbuildings.
- Show the cause. Missing shingles above a ceiling stain, a broken window above wet flooring, a water line on the wall.
- Video walkthrough. Narrate one slow walkthrough of the whole house.
A contents inventory
List every damaged item: what it is, brand, age, where you bought it, and what it would cost to replace. Use old photos, bank and card statements, and online order histories to fill gaps. Don’t throw out damaged items until the adjuster has seen them or you have photographed them.
Keep a claim log
| Date | Who you spoke to | What was said or sent |
|---|---|---|
| [date] | [adjuster name, company] | [summary; what they promised; follow-up date] |
Confirm every phone call with a short email: “Per our call today, you said…”
Paperwork to keep
- Your policy, declarations page and every letter from the insurer
- Every estimate: the insurer’s, your contractor’s, any independent adjuster’s
- Receipts for temporary repairs, living expenses and replacements
- Photos of the property before the storm, if you have them
Why it matters
Written records are what start the insurer’s legal deadline to pay. Since August 1, 2025, an insurer may require its own state-approved proof-of-loss statement. If yours does, it must send the form within 10 business days of your claim. Return it complete and keep a copy, because that form is what starts the payment deadline.
Part 3: The adjuster’s inspection
The adjuster’s inspection sets the starting number for your claim. Being prepared, and knowing when to bring in your own expert, can change that number.
Before the adjuster arrives
- Have your photos, receipts and contents list ready.
- Make a written list of every damaged area, inside and out, so nothing is skipped.
- Have your contractor or roofer there if you can.
- Ask whether the adjuster works for the insurer, an independent firm, or is doing a “remote” or desk review.
During the inspection
- Walk the adjuster through every item on your list.
- Ask whether they will get on the roof. A ground-level look misses damage.
- Take your own photos of what they inspect.
- Ask when you will get the written estimate.
Remote and desk adjusting
After big storms, many insurers rely on photos, aerial images or a “remote electronic inspection” instead of a site visit. If no one physically inspected your roof, ask for an in-person inspection in writing.
Reading the insurer’s estimate
Most insurers price claims with the same estimating software. I’m trained on that software, so I can read an estimate line by line and see what was left out or underpriced: missing rooms, wrong materials, low quantities, or no steep-roof and safety charges.
When to ask for a re-inspection
- The estimate leaves out damage you showed the adjuster
- Your contractor’s price is far above the insurer’s
- Hidden damage turns up during repairs
Ask in writing and send your contractor’s estimate and photos. For larger claims, I bring in independent adjusters, roofers and engineers to re-inspect and document the full loss.
Questions after a storm? 504-834-4000. Back to Louisiana Hurricane Insurance Claims